By 29 April, the battle of the landing was over; both sides had fought themselves to a standstill. While the New Zealanders and Australians had established a beachhead at Anzac Cove, they had failed to capture Mal Tepe, let alone the north-south road. Yet the Ottomans had failed to throw the invaders back into the sea. Further south at Helles, the British and French had established a tenuous foothold on the peninsula but failed to achieve their other objectives. It was a stalemate.
Early offensives

In the aftermath of the landings, the Anzacs spent time consolidating their position. Unit commanders restored order and discipline. Men dug trenches, unloaded stores and established lines of communication between the front line and headquarters.
Malone and Quinn's Post
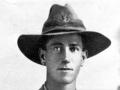
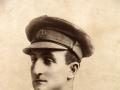
Lieutenant-Colonel William Malone commanded the Wellington Battalion at Gallipoli. In the weeks after the landing, he helped consolidate and secure vulnerable parts of the Anzac perimeter. At Quinn’s Post, where a small advance by the Ottomans would have threatened the entire front, Malone established an almost impregnable defensive position. He died on Chunuk Bair on 8 August 1915.
Once the perimeter was relatively secure, ANZAC commander Lieutenant-General Birdwood attempted to take the offensive. On the evening of 2 May, the New Zealand and Australian Division, supported by four Royal Naval Division battalions (recently arrived from Helles), launched an attack on the dominating Baby 700 position. The plan called for Australian units to attack from Quinn’s Post while the Otago Battalion advanced out of Monash Gully, north of Quinn’s, and secured the seaward slopes of Baby 700. Australian troops would then move forward to take the inland slopes.
Poorly prepared and badly coordinated, the attack went badly from the outset. The Otago Battalion’s move from Walker’s Ridge to the head of Monash Valley took longer than expected, and it was not in position when the Australians launched their attack. When the Otagos finally charged out of Monash Gully, 90 minutes late, the forewarned Ottomans mowed them down. At daybreak, the exposed nature of the New Zealand and Australian positions became apparent as they drew heavy fire from Second Ridge. When they withdrew, units of the Royal Naval Division tried to continue the advance, but also suffered heavy losses. The failed assault cost the Anzacs a thousand casualties and gained nothing.
Battle of Krithia

Unable to break through at Anzac, Hamilton focused the MEF’s energies on the Helles sector, targeting the village of Krithia (Alҫitepe) and the hill known as Achi Baba (Alҫi Tepe). An attack by British and French forces on 28 April – the First Battle of Krithia – made little headway and cost some 3000 casualties. To offset these losses, Hamilton dispatched the 29th Indian Brigade and British 42nd Division to Helles from Egypt. Another French division arrived shortly afterwards. The Ottomans matched this build-up of forces and on 1-2 May launched a major attack on the Allied line, which only just held.
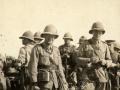
After defeating the Ottoman attack at Helles, Hamilton decided to launch a new offensive towards Krithia to take advantage of the ‘weakened’ Ottoman defences. He looked to Anzac for the reinforcements needed for this second attack. On the night of 5-6 May, the New Zealand Infantry Brigade and the 2nd Australian Infantry Brigade were ferried down to Helles, along with one New Zealand and four Australian field artillery batteries which had been unable to get ashore at Anzac.
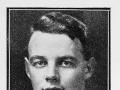
I watched the 12th Nelson Company make an advance over open country called the Daisy Patch. There was absolutely no cover for them. They lost their commanding officer, and several men were casualties. Ray Lawry then came up and led the 2nd Company over the same place, with a good dash. He got through safely, setting a fine example of courage to the men. He is a plucky beggar.
Our turn to go across came next, and we went over the top in good order, with the best of luck. At once we were greeted with a terrible fusillade of rifle and machine gun fire, which was deadly. The man on my right had his brains shot out into his face, and the chap on my left was shot through the stomach. Halfway across the patch I tripped over a root and fell down. I lay still for two or three minutes until I had recovered my breath. Then the bullets started plugging up the earth all around me, so I got up again and made for the Turkish trench as hard as I could go. I reached it without being hit, but was almost dropping with weakness. There was no room in the trench for me, so I jumped into a river bed close by and found a safe place.Walter (Bill) Leadley, Canterbury Battalion, in Gavin McLean, Ian McGibbon and Kynan Gentry (eds), The Penguin book of New Zealanders at war, Penguin, Auckland, 2009, p. 136
In the Second Battle of Krithia, which began on 6 May, the Allies launched a series of unsuccessful daylight assaults on the Ottoman trenches. They suffered heavy losses and were unable to break through. The New Zealand Infantry Brigade went into action on the 8th, tasked with capturing Krithia. It was a disaster – the New Zealanders had little time to prepare and attacked behind a weak artillery barrage. The troops charged across the Daisy Patch into a hail of Ottoman machine-gun and rifle fire. The New Zealand infantry suffered 835 casualties and achieved nothing, an experience repeated all along the line. By the time Hamilton broke off the attack that evening, the Allies had lost 6500 men killed or wounded and advanced just 500 m.
Reinforcements arrive

Following the Krithia debacle, the shattered New Zealand Infantry Brigade was taken out of the front line and went into reserve at Helles. It received a much-needed reinforcement draft of 900 men from Egypt before shipping back to Anzac on the night of 19-20 May. In the interim, the New Zealand Mounted Rifles Brigade (commanded by Brigadier-General Andrew Russell) and the 1st Australian Light Horse Brigade had arrived at Anzac on 12 May. Sent from Egypt without their horses, the Mounted Rifles fought as infantry for the remainder of the campaign.
The Mounteds’ baptism of fire was not long in coming. On 19 May, some 40,000 Ottoman troops attacked the Anzac perimeter in an attempt to overrun and annihilate the enclave. In the New Zealand sector, troops successfully defended Russell’s Top against a series of frontal assaults, while the Australians did the same further south. The Anzacs inflicted enormous casualties on the attacking waves of Arab and Turkish infantry. By the end of the carnage, more than 3000 Ottoman bodies carpeted no-man’s-land. As these rotted in the sun, the smell became so unbearable that both sides agreed to a day-long truce on 24 May to bury the dead. This respite in living conditions was short-lived.
As soon as you grabbed a corpse by the arm to drag it over to a hole, the arm came off in your hand. So you just ended up by scratching a little bit of trench alongside of it, rolling it over into the trench and scraping some stuff back over the top. Nobody handled on that day was buried more than six or eight inches underground.
The stench was so numbing that the incentive was to get out of it as quick as you possibly could. So finally, instead of one man digging a hole here, 10 men got on to it and scratched and scratched, and instead of one body going into it, 20 bodies went into it. We thought, We’ll eventually have all this land, they can have reburials and sort it out. But we never took that land, and those dead were never buried any deeper. The first shower of rain, they were practically out and about again.Vic Nicholson, Wellington Battalion, in Jane Tolerton, An awfully big adventure: New Zealand World War One veterans tell their stories, Penguin, Auckland, 2013, p. 71
Stay or go?
With Allied operations at Gallipoli going badly, the newly formed Dardanelles Committee (which had replaced the War Council) met in London to consider the future of the campaign. Should they continue with the land operation, or cut their losses and withdraw? Influenced by political considerations, they decided to persist, and agreed to send Hamilton additional forces.
Hamilton made further attempts to break through the Ottoman lines at Helles during June and July. Heavy artillery bombardments preceded small gains at the cost of 12,000 British and French casualties. Ottoman troops merely pulled back up the slopes of Achi Baba and waited for the next onslaught. With the situation at Helles seemingly stalemated, attention switched back to Anzac.